Mastering Fried Apple Pies: From Biscuit to Golden Hand-Held Treat
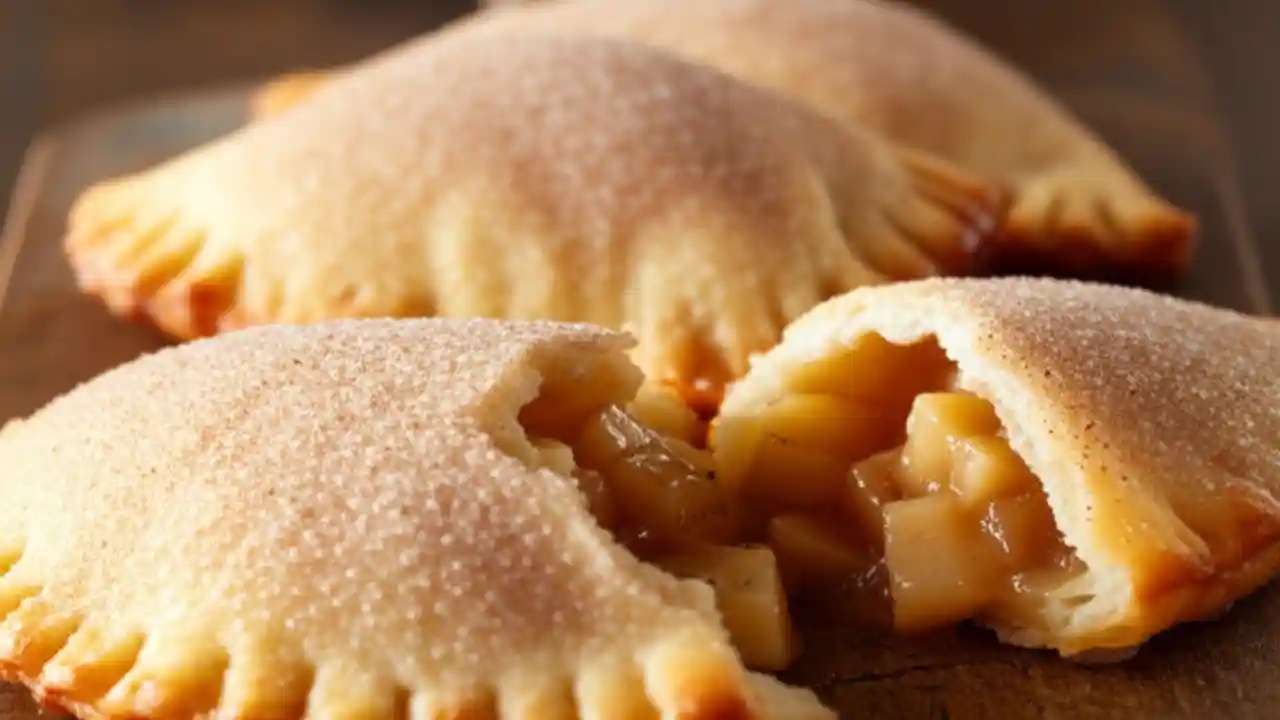
There's something uniquely comforting and irresistibly delicious about a classic apple pie. But imagine taking all that warm, spiced apple goodness, encasing it in a perfectly crisp, golden crust, and making it perfectly portable. Enter the world of
fried apple pies – a beloved hand-held treat that delivers all the nostalgic flavors of a traditional pie in a convenient, utterly delightful package. Whether you're a seasoned baker or new to the art of pie making, mastering these little golden crescents is a rewarding culinary journey. From the simplest biscuit-based versions to the more intricate flaky-dough creations, this article will guide you through crafting these perfect individual desserts, ideal for picnics, potlucks, or even a delightful breakfast on the go.
The Heart of the Pie: Crafting the Perfect Apple Filling
The foundation of any exceptional fried apple pie lies in its filling. A perfectly balanced apple mixture provides the sweet, tangy core that makes these treats so addictive. Our journey begins in a sauté pan, transforming humble apples into a luscious, tender filling.
To start, you'll need:
*
Butter: A generous knob of butter melts into a large sauté pan, providing a rich base for your apples.
*
Apples: The choice of apple is crucial. While Granny Smiths offer a delightful tartness that cuts through the sweetness, a mix of varieties like Fuji, Honeycrisp, or Golden Delicious can add complexity and varying textures. Peel, core, and dice your apples into small, uniform pieces to ensure even cooking.
*
Sugar: Granulated sugar sweetens the mixture, complementing the natural sweetness of the apples. Adjust to your preference and the tartness of your chosen apples.
*
Cinnamon: This warming spice is the quintessential partner to apples, infusing the filling with its characteristic aroma and flavor. Don't be shy!
*
Lemon Juice: A squeeze of fresh lemon juice is a secret weapon. It brightens the apple flavor, prevents browning, and adds a touch of acidity that balances the sweetness.
Combine these ingredients in the butter-melted pan and cook over medium heat. Stir frequently to prevent sticking and ensure even cooking. The goal is to soften the apples without turning them into complete mush – they should still retain a slight bite. This process typically takes about 15 minutes, depending on the apple variety and dice size. Once the apples are tender and the mixture has thickened slightly, remove it from the heat.
Crucially, allow the filling to cool completely before using it. Warm filling can make your dough sticky and difficult to work with, potentially leading to tears and leaks during assembly and frying. A fully cooled filling will also hold its shape better within the pie.
Dough Decisions: From Southern Biscuit to Flaky Amish Fry Pies
The crust of your fried apple pie defines its character. While the ultimate goal is a golden, crispy exterior, the type of dough you choose offers different textural experiences.
The Accessible Biscuit Dough Method
For speed and simplicity, especially for beginners, store-bought biscuit dough is a fantastic shortcut. It creates a soft, slightly chewy crust that fries beautifully.
1.
Preparation: Lightly flour your work surface. This prevents sticking and makes rolling easier. Take each biscuit from the can and roll it out. Aim for a circular shape, approximately 7 to 8 inches in diameter. The key is to achieve a consistent thickness without overworking the dough, which can make it tough.
2.
Filling: Once your biscuit circles are ready, place 2 to 3 tablespoons of the cooled apple filling onto one half of each circle. Be careful not to overfill, as this is a common cause of pies bursting open during frying. Leave a clear border around the edge for sealing.
3.
Sealing: Lightly brush the edges of the dough circle with water. This acts as a glue, helping the dough adhere to itself. Carefully fold the unoccupied half of the circle over the filling, creating a perfect half-moon shape.
4.
Crimping: To ensure a secure seal and prevent any filling from escaping into the hot oil, use the tines of a fork to press firmly along the curved edge of the pie. Not only does this seal the pie, but it also creates a decorative, classic crimped edge.
Exploring Flaky Dough for Authentic Fry Pies
While biscuit dough offers convenience, many traditionalists, particularly those familiar with Amish Country's delectable fry pies, prefer a dedicated flaky dough. This dough, often similar to a pie crust or puff pastry but designed to withstand a full dip in hot oil, offers a distinctly crispier, more delicate texture that shatters beautifully with each bite. If you're ready to elevate your fried apple pie game and delve into the world of truly authentic fried apple pies, exploring a homemade flaky dough recipe is a rewarding step. These pies, often known as
Amish fry pies, are renowned for their delicate, melt-in-your-mouth crust.
The Art of the Fry: Achieving Golden Perfection
Frying is where the magic truly happens, transforming your dough-wrapped filling into a golden, irresistible masterpiece. Safety and precision are paramount when working with hot oil.
1.
Preheat Your Oil: If using a deep-fryer, fill it with your preferred frying oil (vegetable, canola, or peanut oil are good choices) and preheat to 350°F (175°C). If you don't have a deep-fryer, a heavy-bottomed pot or Dutch oven works well. Use a deep-fry thermometer to monitor the oil temperature, as maintaining a consistent heat is key to even cooking and preventing soggy or overly greasy pies.
2.
Careful Immersion: Gently add the pies to the hot oil, one at a time, being careful not to overcrowd the fryer. Overcrowding will lower the oil temperature significantly, resulting in greasy pies. Typically, two to three pies at a time is ideal, depending on the size of your pot or fryer.
3.
Frying Time: Fry the pies for approximately 5 to 8 minutes. During this time, you'll need to turn them as necessary to ensure even browning on both sides. The goal is a beautiful, uniform golden-brown crust.
4.
Draining: Once they reach that perfect golden hue, carefully remove the pies from the oil using tongs or a slotted spoon. Immediately transfer them to a plate lined with paper towels to drain any excess oil. This step is crucial for achieving a crisp, non-greasy exterior.
5.
Immediate Sweetening: For that iconic finish, immediately sprinkle the hot fried apple pies with powdered sugar. The heat from the pies will help the sugar adhere, creating a lovely, sweet coating. Alternatively, a sprinkle of cinnamon sugar or a drizzle of a simple glaze (made from powdered sugar and a touch of milk or water) can provide an extra layer of deliciousness.
Safety Tip: Always exercise extreme caution when frying. Keep a lid nearby in case of a grease fire (do NOT use water!), and ensure children and pets are away from the hot oil.
Beyond the Basics: Serving Suggestions & Creative Twists
Once your
fried apple pies are golden and dusted, the true enjoyment begins. Their versatility makes them perfect for almost any occasion:
*
Portable Perfection: True to their nature, these pies are the ultimate
portable treat. Pack them for picnics, take them to potlucks, or simply grab one on your way out the door. No plates or forks required!
*
Breakfast Delight: Why wait until dessert? A warm fried apple pie makes for an incredibly indulgent and satisfying breakfast.
*
Individual Desserts: Arrange them on a buffet table for a charming, rustic dessert option. They're much easier to serve than a traditional whole pie.
*
Gourmet Toppings: While powdered sugar is classic, don't hesitate to experiment. A scoop of vanilla bean ice cream melting over a warm pie, a dollop of whipped cream, or a drizzle of caramel sauce can elevate them to gourmet status.
*
Spice Variations: Beyond cinnamon, consider adding a pinch of nutmeg, allspice, or even a tiny amount of cardamom to your apple filling for a more complex flavor profile.
*
Other Fruit Fillings: Don't limit yourself to apples! The same method can be adapted for other fruit fillings like peaches, cherries, or berries for seasonal variations.
Conclusion
From the humble biscuit to a golden, flaky crust, mastering
fried apple pies is a delightful journey into classic comfort food. They embody the perfect blend of simplicity and indulgence, offering a hand-held slice of heaven that's both deeply satisfying and incredibly versatile. Whether you're whipping up a batch for a family gathering, a leisurely weekend breakfast, or as a charming addition to your next outdoor adventure, these golden treats are guaranteed to bring smiles. So, roll up your sleeves, embrace the warmth of spiced apples, and prepare to fry your way to a truly unforgettable culinary experience.